
Then, I had considered several designs of automaton with some gears. Common designs of automata are concrete shapes like; a dog, bird, butterfly and doll. I have seen some YouTube videos and there are many beautiful artistic automata.
Hmm, what shall I make?
I wanted to make something that nobody made, not a doll or not an animal. Yes, I know. I should better make something simple at first. Having said that, it wouldn't be fun only making gears. I thought that I wanted to make something extra added.
I had considered some designs, but I felt something different. I wonder how many days I have spent thinking up ideas. Anyway, I finally got a convincing idea, that was the one using moire. Some gears have several holes on the surface of a gear. Probably, it is not a design, it is to make the weight of the gears light. If I make moire pattern holes instead, how would it be?
Firstly, I was going to make the same pattern holes to two gears and pile them up. I told my idea to my husband, Juno and he said, "Why don't you make the same pattern on the surface of a board that holds gears?" Wow, that's a good idea! That's easier than rotating two gears. Let's go with it!
Once the outline was decided, I could work smoothly ... I expected, but I was wrong. I didn't know about moire and I didn't know what kind of pattern can be appear well in moire. What I did was make patterns suitably on the 2D software and I made some animation. Some could appear moire and some couldn't.
Hmm. I was stuck.
Here again, another bad habit came out. I didn't know what the result would be, but let's try it! I was not decisive, I was just getting tired of trying patterns of moire. I had exported the data of gears from the software Gearify. At this time, I found a familiar face on the website of the software, it was Oskar van Deventer. It was nice to know that he also uses the same software.

I imported the data to 3D software and added several drawing lines on it. Then, I exported the DXF data. The next step was importing the data to the Cam software and setting several data like; the diameter of the bit, depth of the holes and so on, then I exported a G-code. The last step was importing the G-code into the CNC software. All procedure on the computer was finally done. Oh, it took a long time.
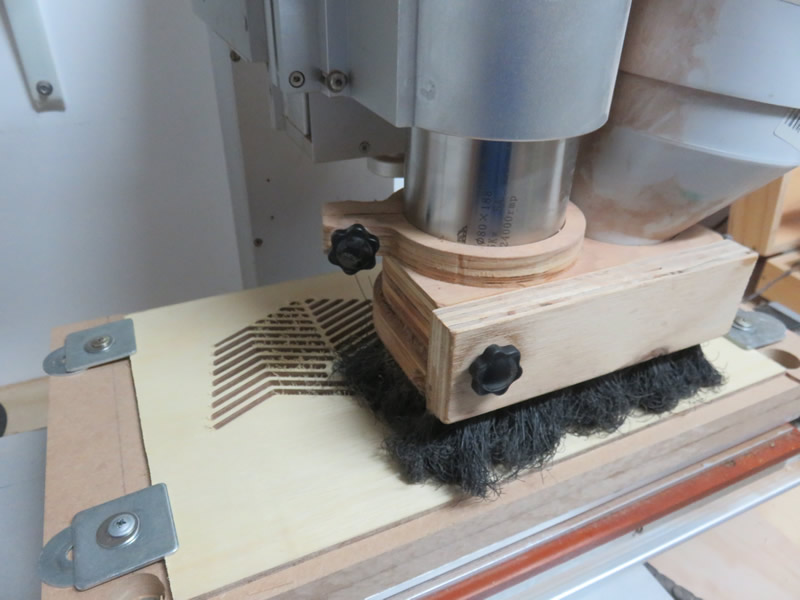
Here are pictures of cutting gears and the board using the CNC router.


I had experienced several issues while I was using the CNC router. I can say that there are lots of pitfalls using a CNC router. If you lose your attention, you may make a terrible mistake. CNC routers are very useful machines, but it is not easy to use. I am very sure if Juno hadn't kept an eye on my work, I would have made many mistakes or probably, I might have broken off some bits.
Ta-dah! This is my first gear creation "Moire Gears No.1."

This is the second "Moire Gears."

I named it "Moire Gears." I have made the second one too. The square pattern on the first one didn't show moire, so I have changed the pattern. It works well.
Can you see moire? I could experience how the CNC router works. Thank you for your help, Juno. It was a wonderful experience for me. I am going to make something different from "Moire Gears" next.
Gorgeous!
ReplyDeleteThank you!
Delete